Configuring Apple as a Federated Authenticator
This page guides you through configuring Apple as a federated authenticator in the MWARE IAM.
Follow the steps below to configure the MWARE IAM to authenticate users using their Apple credentials.
How it works
When a user attempts to log in to a client application through Apple Sign In:
- The client application initiates the authentication flow by communicating with the MWARE IAM.
- MWARE IAM redirects the user to the Apple Sign-In page.
- Apple authenticates the user and redirects the user back to the MWARE IAM with an authorization code.
- MWARE IAM sends the authorization code to the Apple Sign-In token endpoint and requests an ID token in return.
- Apple validates the client application's client ID, client secret, and authorization code and responds with an ID token, access token, and refresh token.
- MWARE IAM validates the received ID token and extracts the authenticated user information.
- MWARE IAM completes the authentication flow by redirecting back to the client application with the authenticated user information.

Prerequisites
Before adding Apple as a federated authenticator on the MWARE IAM, you need to register an application on the Apple Developer Portal and make sure you obtain the following:
- Client ID: This identifies the requests sent from MWARE IAM to the application.
- Client Secret: This authenticates the requests sent from MWARE IAM to the application.
- Callback URL: This is the URL to which Apple sends the response after authenticating the user.
Refer to Apple's official documentation for more details on registering an application on the Apple Developer portal.
Configuring the identity provider
To configure the MWARE IAM as an identity provider that uses Apple for federated authentication:
-
On the Management Console, go to Identity > Identity Providers > Add.
The Add New Identity Provider screen appears.

-
Enter a meaningful name as the Identity Provider Name, e.g.,
AppleSignIn. -
Expand Federated Authenticators > OAuth2/OpenID Connect Configuration and enter the required values as given below.
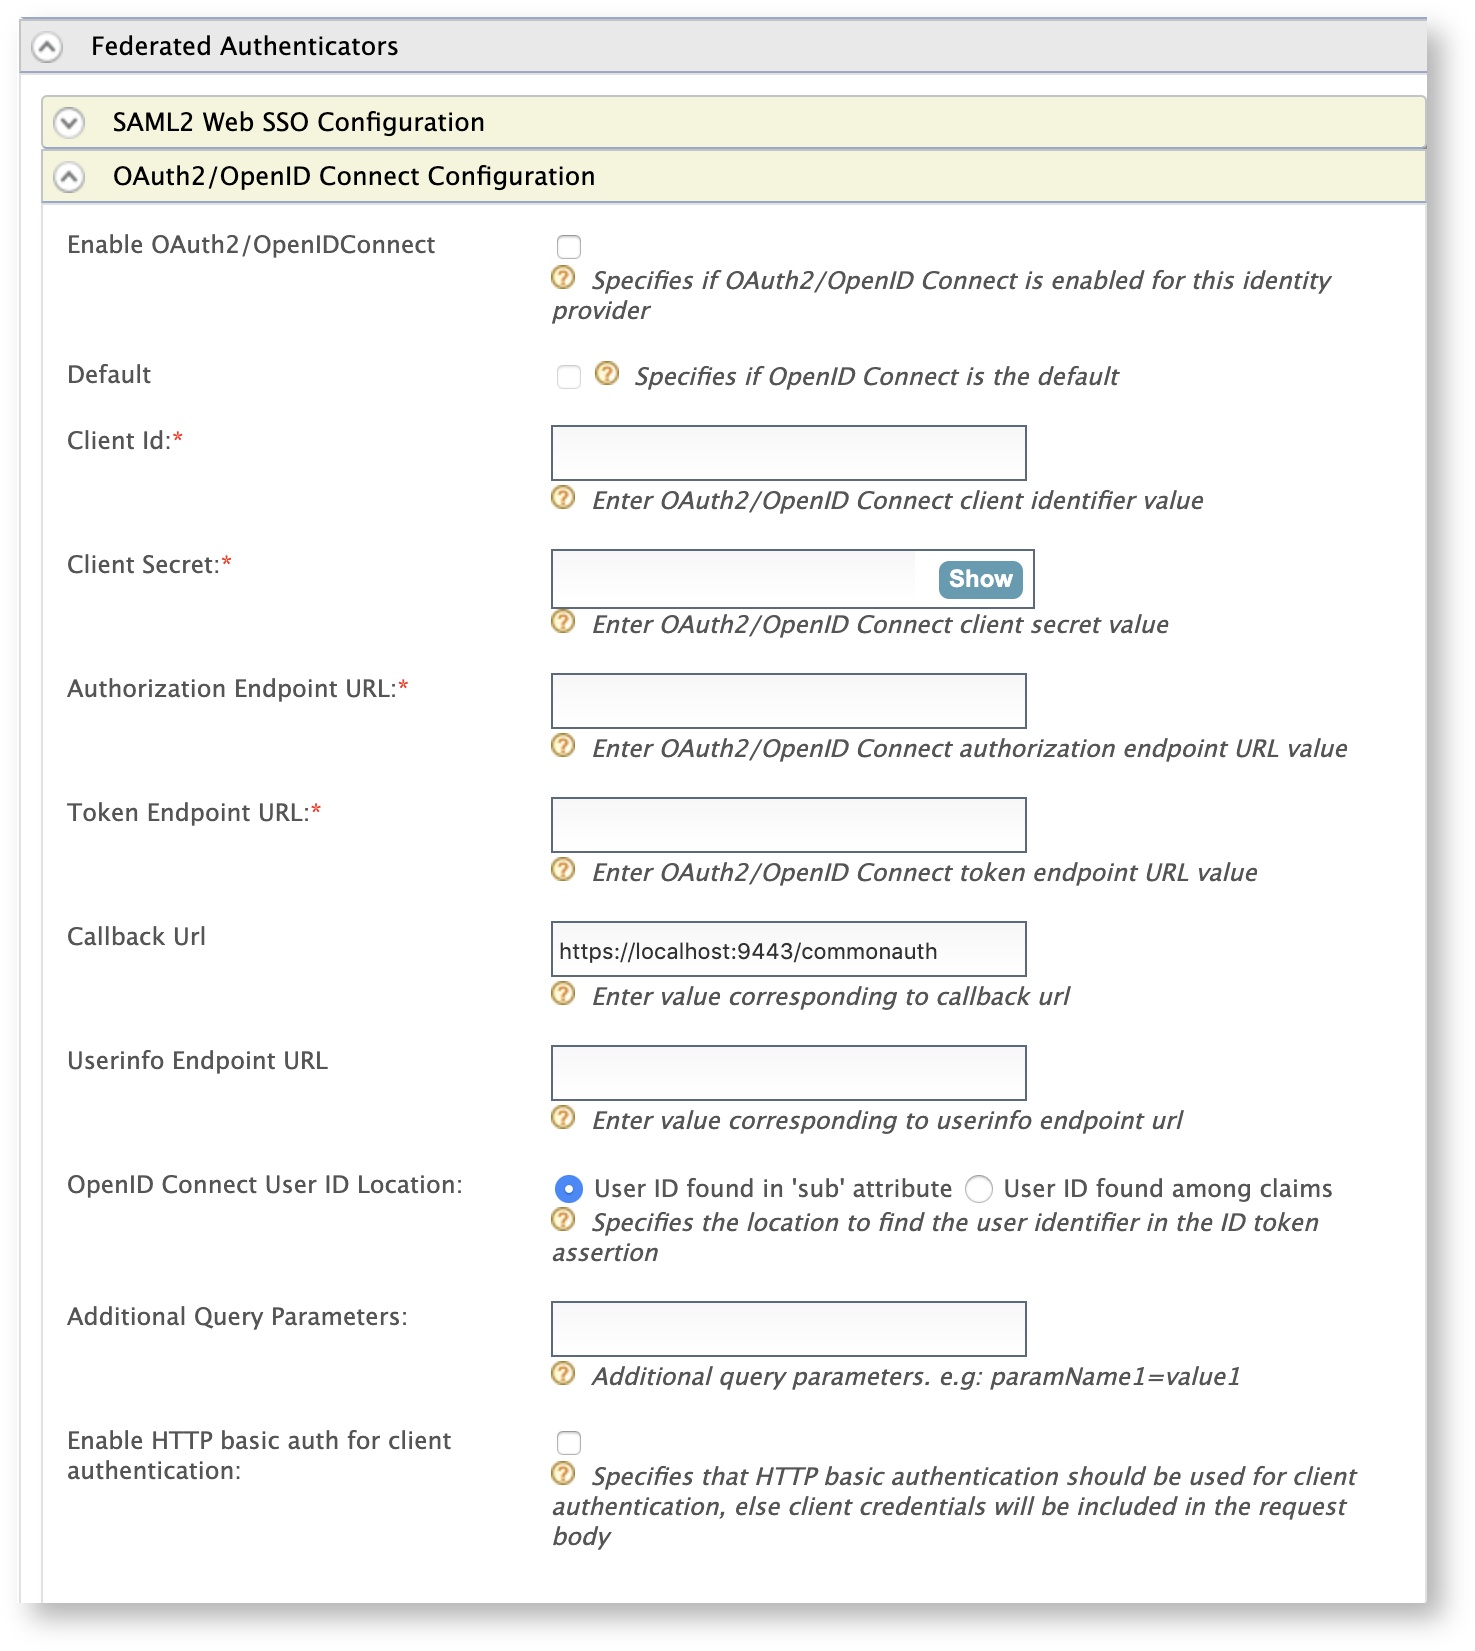
Field Description Sample Value Enable OAuth2/OpenIDConnect Selecting this option enables OAuth2/OpenID Connect to be used as an authenticator for users provisioned to the MWARE IAM. Selected Default Selecting this option signifies that OAuth2/OpenID Connect is used as the main/default form of authentication. Selecting this removes the selection made for any other Default checkboxes for other authenticators. Selected Client Id This is the client keyof your Apple application.idp.demologin.comClient Secret This is the client secretof your Apple application.Authorization Endpoint URL This is the authorization endpoint URL of Apple Sign In. https://appleid.apple.com/auth/authorizeToken Endpoint URL This is the token endpoint URL of Apple Sign In. https://appleid.apple.com/auth/tokenCallback URL This is the URL to which the browser should be redirected after the authentication is successful. This should be the commonauth endpoint of Identity server. https://localhost:9443/commonauthUserinfo Endpoint URL This is not relevant for this feature. - OpenID Connect User ID Location This is not relevant for this feature. - Additional Query Parameters These are the additional query parameters that are necessary to authenticate users through Apple Sign In. scope=openid email&response_mode=form_postEnable HTTP basic auth for client authentication This is not relevant for this feature. Warning
Make sure to keep it unselected.
-
Click Register.
You have successfully added the identity provider.
Note
Apple expires the client secret after six months. See Apple Documentation for more information.
Configuring the service provider
To configure the client application as a service provider in MWARE IAM:
-
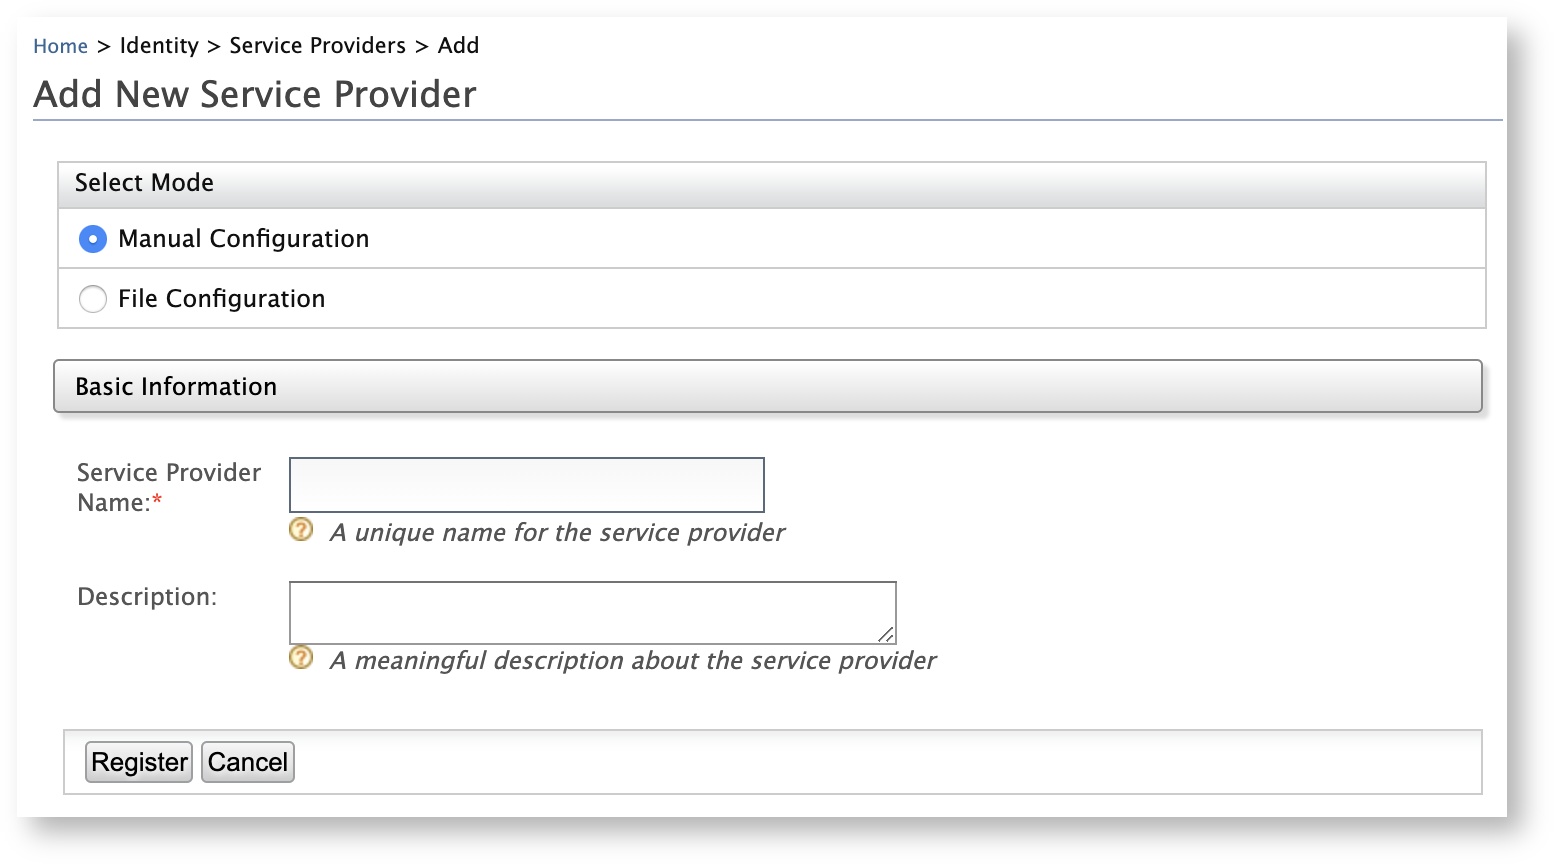
On the MWARE IAM Management Console, go to Identity > Service Providers > Add.
The Add New Service Provider screen appears.
-
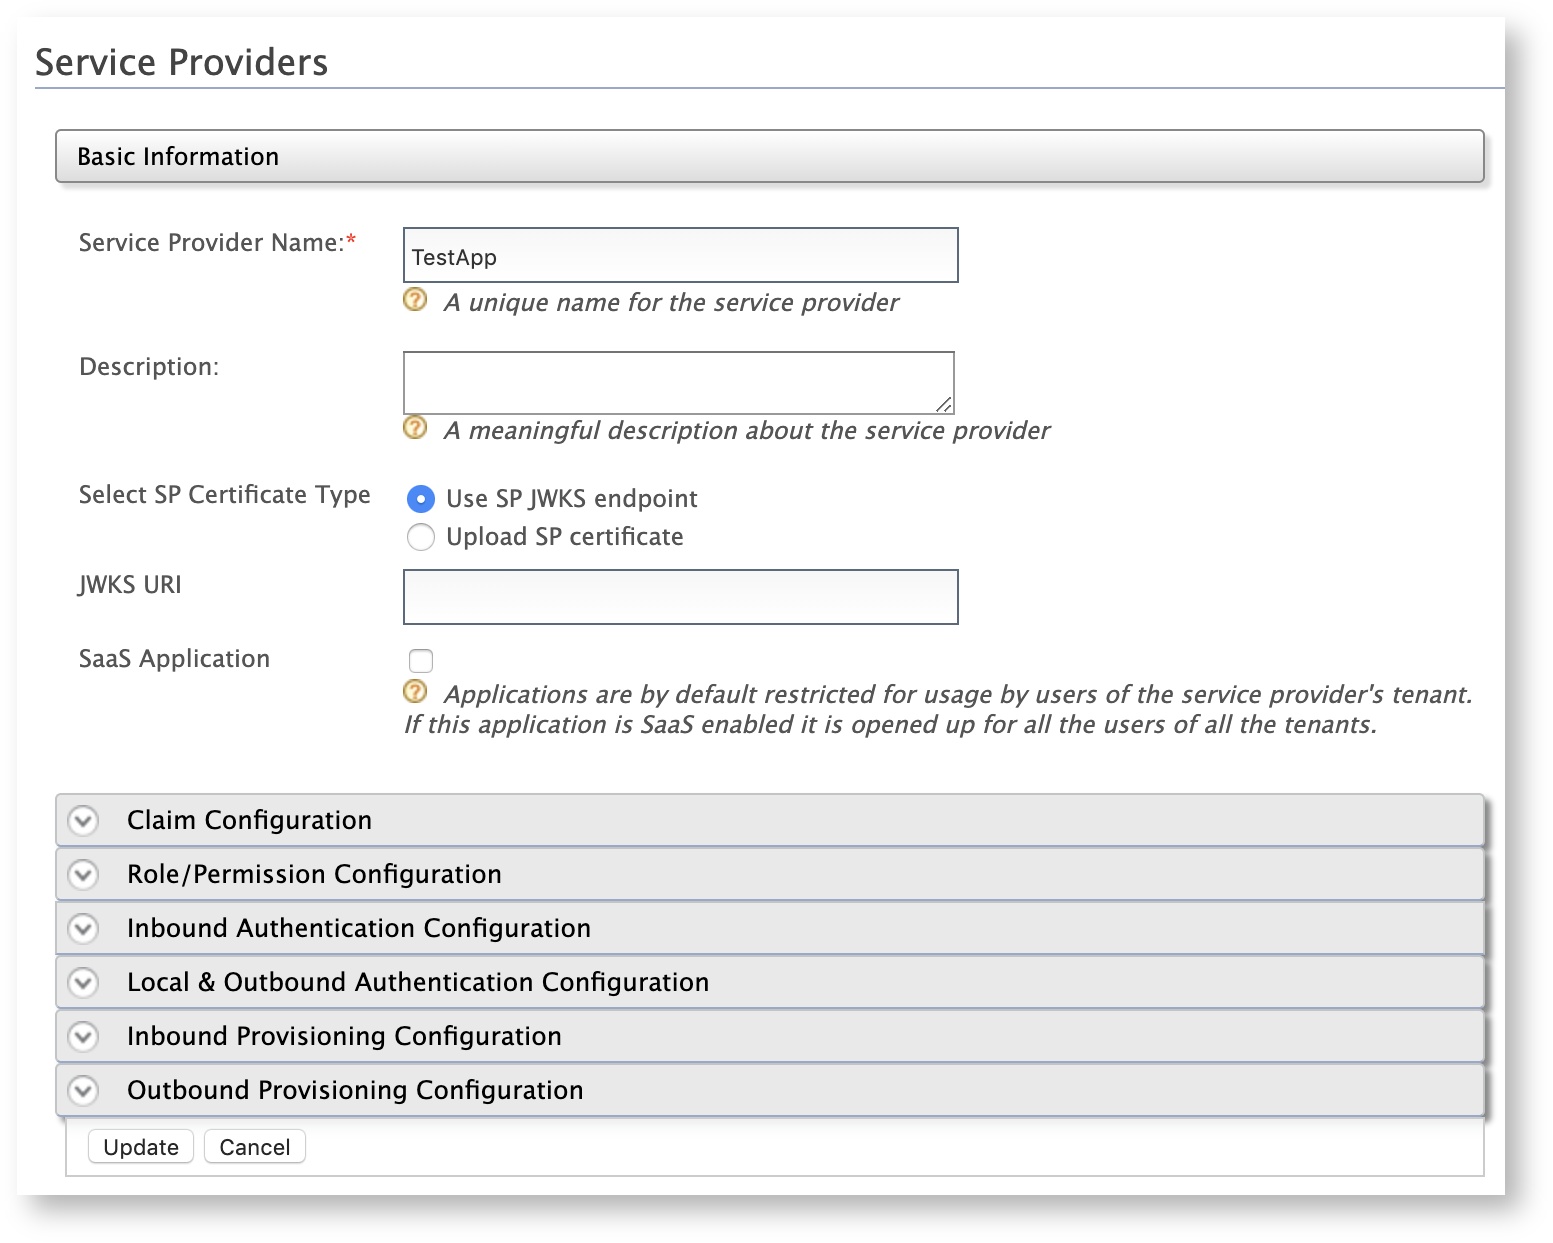
Enter a meaningful name as the Service Provider Name text box and click Register. The Service Providers screen appears.
-
Expand the Inbound Authentication Configuration section and configure it based on the authentication protocol that is required for the client application.
Tip
If your client application uses OpenID Connect, click OAuth/OpenID Connect Configuration > Configure.
-
Enter the
callback URLof your Apple application. -
Click Register. You will be redirected to the Service Providers screen, which displays the
client keyandclient secret.
Info
For more information on inbound authentication configurations, see Configuring Inbound Authentication for a Service Provider.
-
-
Expand Local and Outbound Authentication Configuration section, select Federated Authentication as the Authentication type and select the identity provider as
AppleSignIn.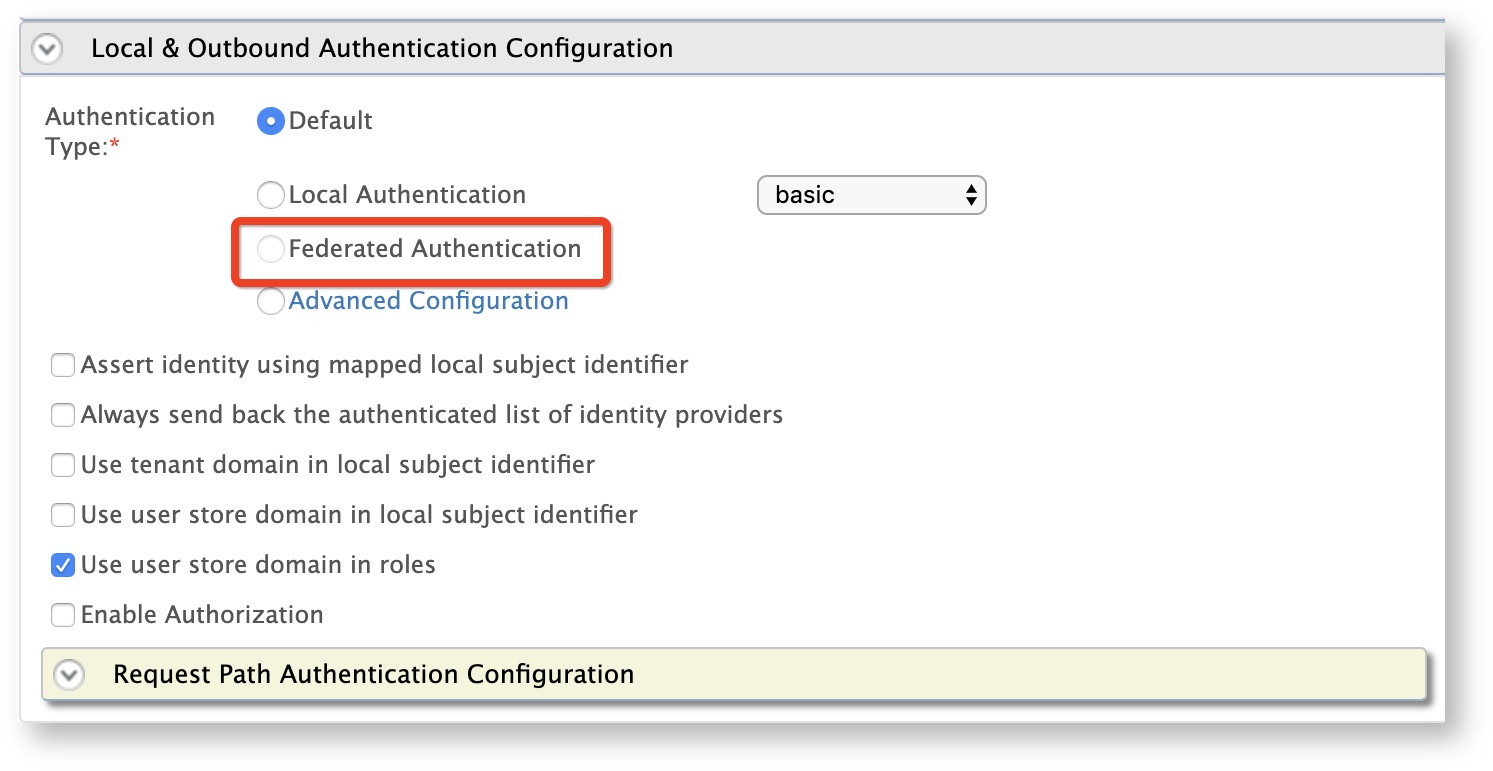
-
Click Update to save the changes.
You have now successfully added and configured the service provider. You can now log in to the client application with your Apple ID.
Top